Categories
Misc Open source / Freeware

Filmpjes op de achterbank “the hard way”

Ik heb nog even tijd, maar het is bijna weer vakantie, tijd om uren in de auto te zitten om naar je vakantie adres te gaan. De kinderen mogen mee πŸ˜› , maar alleen als ze niet zeuren onderweg.

Hihi, ik weet zelf dat een vliegreis sneller gaat als je filmpje kan kijken dus dat zal ook gelden voor mijn kinderen!

Dus ik koop via bol Salora DVP7048TWIN – Portable DVD-speler met 2 schermen – 7 inch.
Vooral het ophangsysteem lijkt erg handig.
Maar de belangrijkste reden is dat er een usb poort op zit.
De rest van de beweegreden mag je raden.

Naief dat ik ben ga ik er-van-uit dat het gebruik van usb gemakkelijk is. FF een filmpie overzetten en klaar.
Helaas is dat niet zo. Maar ik was voorbereid (eindelijk eens tijd om dat uit te zoeken) en heb dus net zolang gezocht totdat ik het antwoord vond.

En die heb ik… alleen het is “the hard way“.
Dat betekend dat dit document niet voor iedereen is, of de avontuurlijk papa/mama.

Misschien is het gemakkelijker op Windows, maar ik werk op OSX dus sommige dingen worden daardoor alleen wat moeilijker.

Hier wat extra info gehaald over de SALORA DVP7048TWIN en hier wat info specifiek over media-ondersteuning.

Categories
Haxe Open source / Freeware

Pixel Sprite Generator Editor

Recently I ran into this awesome project by Dave Bollinger: Pixel Spaceship (this project is currently not live anymore but still can be viewed via web.archive.org)

And I had to build something with it. And build it in 8 hours.

I knew that wouldn’t be to difficult because I found Dave’s project via a haxe port of a javascript port of the original work of Dave.

My plan is to create a random papertoy based upon the principle Dave explains on his website.
And the first thing I needed was something to test my idea in editor so it would be easier to see the result.

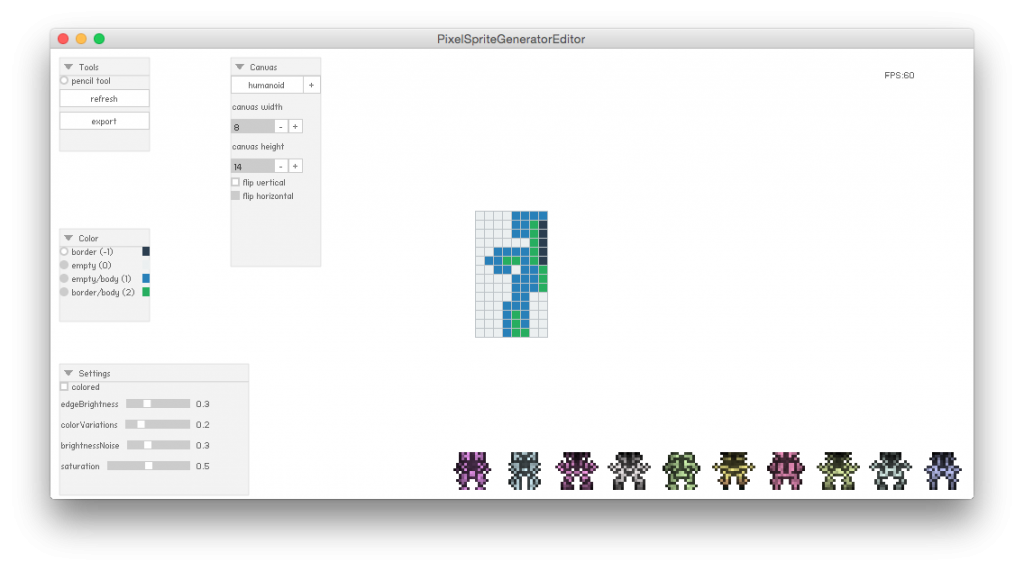
And there it is:
rp_screenshot.png

Pixel-Sprite-Generator-Editor

check the code on github.

Of course it wasn’t exactly 8 hours, and it’s not finished but it works for the purpose I was building it for.
There are probably a lot of issues with it and currently it only exports to Neko.

But it could be a start of an sprite editor for example πŸ™‚ .

Libs used

* Openfl: https://github.com/openfl
* Haxe procedural sprite generator: https://github.com/Zielak/pixel-sprite-generator
* Haxe port of Keith Peters minimalcomps: https://github.com/Beeblerox/MinimalCompsHX

Categories
Animation Haxe Open source / Freeware

Tween engine Go – part 2

My last post was about my new WIP tween library Go.

I have been updating my little experiment and it’s getting better.
Looking into other libraries codes is very educational.

Does it perform as good as the default Haxe tween engine Actuate?
Yeah that would have been great, but nope… around 1300 object, Go will start dropping frame-rate in Flash.

My goal was to create a lightweight, simple, compact, chainable tween library for haxe/openfl.

Could I perform as good as Actuate?
I am not sure, Actuate is very well written and Joshua Granick has been working on it for a long time and tested it extensively.
But I probably could improve on my code and get a better performance in Flash (in which I did the stress-test). The downside is that my code will be full of condition compilation and that would mean the code would become more and more complex.

Why am I sure it will improve, well I cheated and did some flash specific code modifications.
Check the code in github
In my first draft it was just:

var range = _props.get(n);
Reflect.setProperty(_target, n, _easing.ease( time, range.from, (range.to-range.from), _duration ) );

and that performed very bad in Flash (if I remember correctly the framerate already dropped after 100 object)
And I updated it to this and that works better… for Flash

var range = _props.get(n);
#if flash
untyped _target[n] = _easing.ease( time, range.from, (range.to-range.from), _duration ) ;
#else
Reflect.setProperty(_target, n, _easing.ease( time, range.from, (range.to-range.from), _duration ) );
#end

So the question is more do I want to change the code for specific platforms?
For now I am not going to focus on Flash to enhance it’s performance… there is little chance that I will be animating 1000+ objects.

So I will be using it in my own projects and will run into problems that I will fix.
You are welcome to use it as well and report bugs or other improvements.

I’ve update the promotional website: check it here.
You can find the stress-test there, where I compare Go with Actuate.
If you want to add your tweening library, add it here in github.
Download/install instructions can be found here.

Happy tweening.

Categories
Animation Haxe Open source / Freeware

Tween engine Go

I have been playing a lot with Haxe and Openfl in the past, but never for work. That changed this week!

Fun stuff!

A while back I noticed some new tweening engines for Haxe. That got me curious: can I build my own tweening engine?

Yes I can!

I named it Go, like “lets Go”.

(And like they say in a track from The Prodigy – Everybody In The Place, lets go )

You can check it out on github: https://github.com/MatthijsKamstra/go
There you can find more detailed explanation about how it works, so I only will show some basic code here:

Animate a sprite in 1.5 second to x and y position and call function when animation is done

Go.to(sprite, 1.5).x(100).y(200).onComplete(onCompleteHandler, ['hello']);

It was fun to write it, but I haven’t tested in all situations.
I have tested lets.Go on targets flash/cpp/html5/neko.
But I wouldn’t use it in a production situation. It needs more testing.

Let me know what you think!

Categories
Haxe Misc Open source / Freeware

Write CSS with HSS and Haxe on OSX

I’m playing around with Haxe for a while now. My recent experiments are with Neko and PHP.

It’s a little flatfile CMS/website that lets you write Markdown (I’m using mdown from Jason O’Neil) for posts.
For styling (css) I’m using Twitter Bootstrap and for the animations the jQuery wrapper (jQueryExternForHaxe) from Andi Li.
This all is not important for the post, I was just showing off… πŸ˜› …. or showing what you can controle in one project using Haxe (jQuery, php, neko, js and now CSS)!

Using Twitter bootstrap for styling is very quick and nice. But when you want to modify that you will need to write css.
Not a problem, but what if you want to do it the awesome way?

Meet HSS

From the creator of Haxe (Nicolas Cannasse) comes HSS!

HSS is tool that extends the CSS syntax with powerful features such as variables and nested blocks. HSS is a CSS compiler which supports valid CSS syntax, so for every error that occurs during the parsing of the HSS file, it will display and error indicating at which file and which line the error occurred.

Sounds great and it’s written by someone who knows what he is doing, so lets give that a try.
And there comes trouble…

Remember this: I work on Mac OS X 10.6.8.

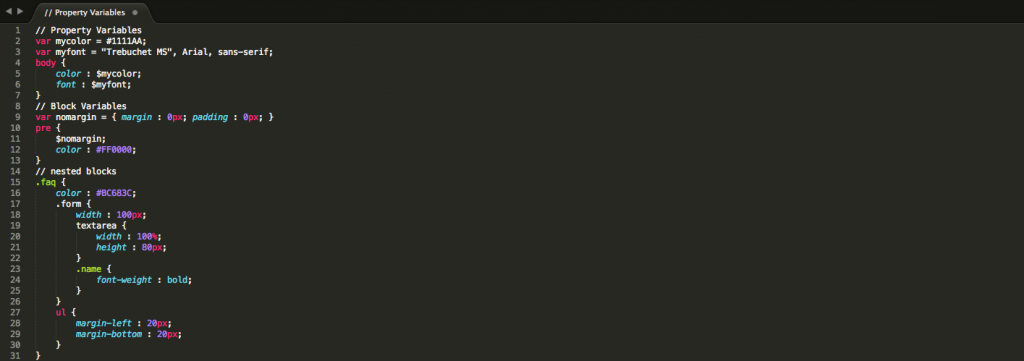
hss example code

Five steps to get started with HSS on OSX

#1
Download the file: HSS OSX version
The normal way of downloading (just click on the link) for some reason didn’t work for me. I had to download it with right-mouseclick and “Save link as…” (Google Chrome).

#2
Extract the file: the file you downloaded is a “gzip” compression file.
The normale decompression program on OSX don’t work with that (Archive Utility), my default decompression program didn’t work either (The Unarchiver).
Stuffit expander works!

And this is important! The other programs seem to work because there is a file created but its not a “exec”. Stuffit expander creates a file name “hss” other programs create a file named “hss-1.3-osx”

There is probably a terminal version to extract (here) but I stopped trying when I had the file.

#3
Where to leave the HSS executable?
I had a little help with that: (Source) for Linux AND OSX you can place it in the “usr/bin/” directory.
That is a hidden folder normally so you need to change that (but I hope you already did that) (read this post about it)
BTW “Users” is not the same as “usr”
When you drop the HSS executable in the bin folder you will be asked for you password

#4
I’m not 100% sure, but when I think about it while I write this I don’t think that you have to do this.
But just in case I’m wrong….
You need to give the file permission to execute (this is still true if you don’t copy the file in the usr/bin folder).
Open the terminal and type “chmod +x ” (without the quotes and don’t forget the space after x) and drag the HSS file in the terminal.
Press enter and you are done.

Create CSS with HXML

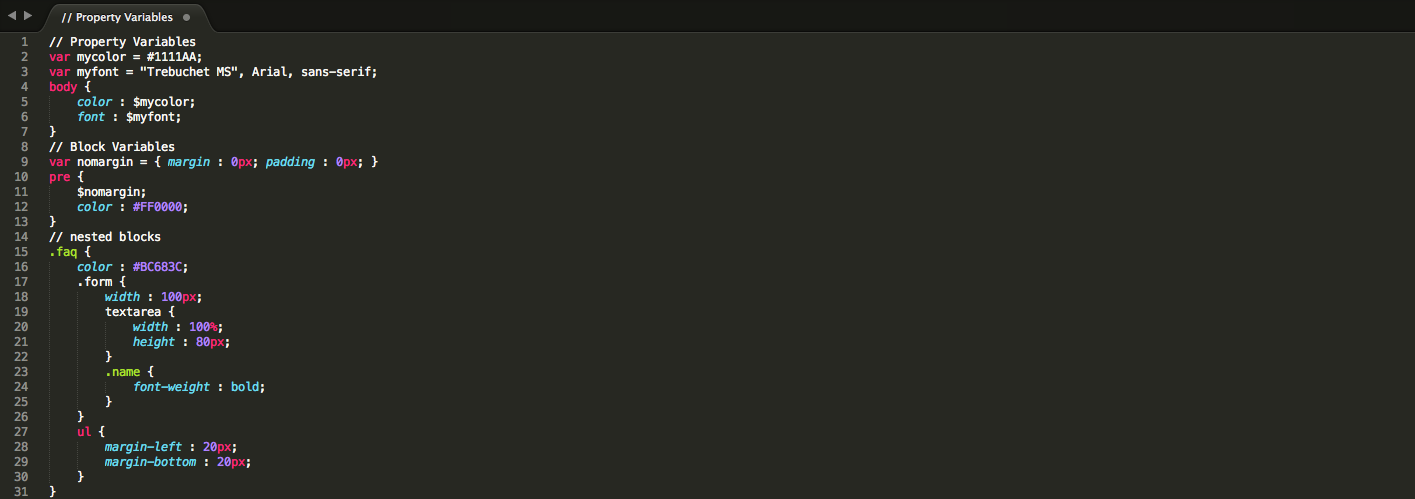
Now we can start with the cool stuff. Lets create an hss file:
(the examples are from Nicolas Cannasse himself)

// Property Variables
var mycolor = #1111AA;
var myfont = "Trebuchet MS", Arial, sans-serif;
body {
    color : $mycolor;
    font : $myfont;
}
// Block Variables
var nomargin = { margin : 0px; padding : 0px; }
pre {
    $nomargin;
    color : #FF0000;
}
// nested blocks
.faq {
	color : #BC683C;
	.form {
		width : 100px;
		textarea {
			width : 100%;
			height : 80px;
		}
		.name {
			font-weight : bold;
		}
	}
	ul {
		margin-left : 20px;
		margin-bottom : 20px;
	}
}
It’s probably useful to mention that ANY CSS file is an HSS file as long it’s validates.
That means that you can take a .css file and rename it to .hss!

(save the file as “style.hss” without quotes in the hss folder; see the folder structure below)

Now update your .hxml file!
Remember I use MonoDevelop 3.0 for OSX

Here a example of the folder structure I used for this example

+ Export
	+ neko
	+ php
+ Source
	+ hss
		- style.hss
	- Foobar.hx
Foobar.hxml

Open your Foobar.hxml file and it should look something like this:

-cp Source
-main Foobar
-neko Export/neko/index.n

--next
-cp Source
-main Foobar
-php Export/php

--next
-cmd "cd Source/hss/"
-cmd "hss style.hss" 
-cmd "hss style.hss -output ../../Export/php/" 
-cmd "hss style.hss -output ../../Export/neko/" 
The quotes are important when on OSX (possibly also for Linux)

Now every time you compile the source for Neko/PHP the css will be compiled in the correct folder!

Brrrrr

Okay, okay, I know I promote MonoDevelop for Haxe coding.
But… for hss/css I don’t think you should use it…
I haven’t tried it yet, but the Haxe plugin for Textmate looks good for it.

happy haxe-ing

Sources used:

Categories
Open source / Freeware

Lightweight CMS For simple projects

I use WordPress for this blog, and happy with it. But it’s not for everybody: you need a database, it’s very impressive, plugins, themes, users, comments, regular update, kinda geeky install and the default installment is 7.9 mb.
And I needed a CMS for a small website/portfolio; it needs something small, not impressive (visually), easy to set up, no database, PHP and light!

So I started to look for: light/lightweight/nano/simple CMS (no database/flat file storage)
This is the list I compared it to:
Very important: free (and not a pro-$$-account), no database/flat file storage, lightweight, easy to install, WYSIWYG editors, PHP
Important: easy to use/beautiful , normal data editing, file manager, easy to create templates/CSS for this system
Nice to have: gallery, no need for multiple users (no a must), no need for backup, no need for multiple languages (english is fine), contact form, html-editor (export to files)

I went a little overboard with the search for the ideal CMS for me.
After reviewing them I gave them a grade from 1->10 and to make it even easier: the highest grade is the one I choose for this project.
So here a little overview to make it somewhat easier to read about my findings:

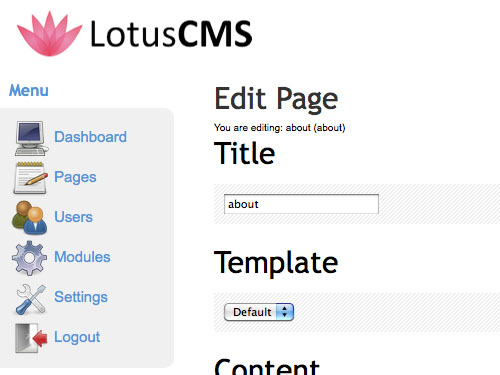
  1. LotusCMS –> 9.5
  2. razorCMS –> 9
  3. gpEasy –> 9-
  4. GetSimple –> 8
  5. CMSimple –> 8-
  6. Pluck –> 7
  7. phpsqlitecms –> 7-
  8. SkyBlueCanvas –> 6.5
  9. NanoCMS –> 6+
  10. Nanomus –> 6
  11. opensolution (Quick.Cms) –> 6-
  12. LightNEasy –> 5
  13. onefilecms –> 4

LotusCMS

It brings to the forefront design and design integration into one of the most neglected CMS niches – Databaseless Web-Design and Development. LotusCMS is free and more than free, it is licensed under the General Public Licence under which you may copy, change and redistribute this software to suit your needs!

Features:

  • A plugin system using the concept of observable classes.
  • A lightweight core, into which everything else is plugged in.
  • Multiple users and user roles.
  • WYSIWYG content editor.
  • A blogging system.
  • Improved general usability and design.
  • An advanced speed caching system for standard pages, with up to a 3 times average speed increase for server-side processing.
  • SEO settings (Search Engine Optimisation), if your installed template supports it.
  • A back-up system.
  • Very beautiful
  • User friendly
  • multiple users but 2 roles
  • Ugly dynamic URLs
  • easy install (check if server is ready, self config with deletion from install file!)
  • Install 2.9 mb

I like it a lot and I give it a 9,5

razorCMS

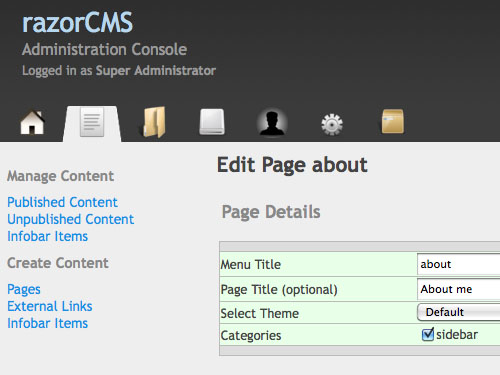
With the further evolution of razorCMS, our goal for the next milestone release is to offer true choice, by offering a more simple intuitive approach, choice of mySQL or flat file storage, and pure razorCMS code putting razorCMS on the map as an original CMS solution with no connection to other CMS solutions.

Features:

  • really small, and works out of the box.
  • You need to install ‘blade’-plugins to add more functionality
  • Flat File design, no database required
  • Simple, fast and security conscious installer
  • Small and fast footprint
  • Modular framework
  • Support for multilingual translations
  • Multiple infobar content displayed on single page
  • External links in link menus
  • Easily modified
  • Easily extendable via blade pack add-on interface
  • Multi level menus
  • Security check for file permissions
  • Full file manager
  • 3 user accounts with varying levels of access (good for handing over to clients)
  • Simple backup manager
  • Automatic invalid login check, blocks invalid logins by IP address after 8 attempts
  • Improved security
  • Multiple theme control
  • Maintenance Mode, keeping your site offline to users but online to you, for changes
  • easy install (check if server is ready, self config with deletion from install file!)
  • possible to work on pages but not published yet

Nice set op plugins: possible to use for posting news, gallery, editor of you choise, nice url, etc

A lot of lite CMS use this: the name of the content is called ‘sidebar’ (you can rename it in this cms!), which made me think
why not call it ‘content’?

It’s beautiful and easy to use. I installed some extra’s to make it even better.
Install: 503 KB (default install) >> need for wysiwig editor and theme
Install: 1.9 mb with install (tinymc / gallery / theme)

I like it a lot and I give it a 9.

gpEasy

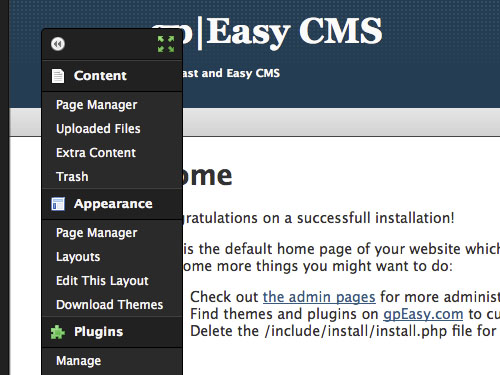
gpEasy is a lightweight CMS (built without the use of a database) which helps us reach our goal of making it fast and easy to use right down to the installation. Once installed, you’ll find an intuitive interface that let’s you edit your entire site in WYSIWYG fashion.

Features:

  • WYSIWYG Editor (CKEditor)
  • Galleries (ColorBox with some modifications)
  • SEO Friendly Links
  • Free and Open Source (GPL)
  • Runs on PHP
  • File Upload Manager
  • Editable Theme Content
  • Deleted File Trash Can
  • Multiple User Administration
  • Works in Safe Mode with FTP Functions
  • Flat File Storage
  • Fast Page Loading
  • Fast and Easy Installation
  • reCaptcha for Contact Form
  • HTML Tidy (when available)
  • themes
  • gallery
  • plugins
  • easy install (check if server is ready, self config)
  • Install: 4.2mb

I like it and I give it a 9-

GetSimple

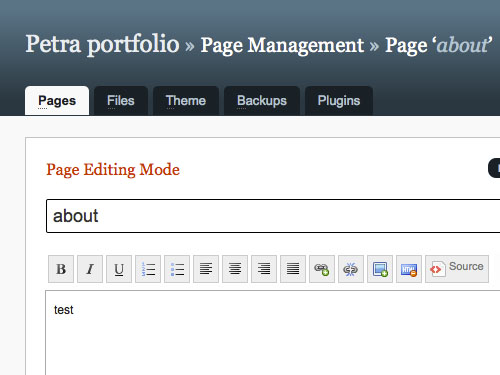
GetSimple is an XML based lite Content Management System. To go along with its best-in-class user interface, we have loaded it with features that every website needs, but with nothing it doesn’t. GetSimple is truly the simplest way to manage a small-business website.

Features:

  • No database
  • XML Based
  • You can “Undo” Almost Everything
  • Easy to Learn UI
  • Simple Installation
  • Simple Theme Customization
  • Designed For the Small-Site Market
  • plugin
  • templates
  • easy install (check if server is ready, self config with deletion from install file!)
  • Install: 2.6mb

strange the need to set a ‘Website Base URL’

I like it: 8
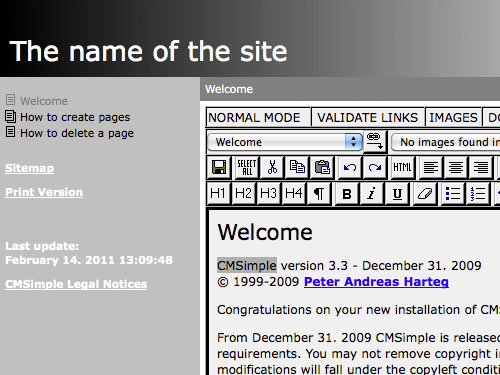

CMSimple


it is small – simple – smart!
Features:

  • Easy installation
  • The CMS script is less than 100 KB
  • Template driven layout using a css script
  • The contents of the site is stored in a single HTML-file
  • Many languages available (both for the user and for site maintenance)
  • Written in PHP – it runs on Linux/Apache servers, or on Win32 with Apache or IIS
  • Inbuilt WYSIWYG editor (both on IE and Mozilla) – or other alternative editors
  • Uploading of images and files
  • Link validation
  • Search function
  • Print version option
  • User downloads from their HTML content file
  • Simple mailform included
  • Easy setup of multi language sites
  • PHP-scripting may be included within the content (named CMSimple Scripting)
  • Integration with 3rd party scripts possible (using CMSimple scripting
  • Online editing of system configuration
  • wwwaut login available
  • Automatic backup on logout
  • Documentation
  • Special download folder
  • Easy install (but it uses the default settings)
  • Install: 117kb

it took me a while to find the login: add &login (index.php?welcom&login) or ?login (index.php?login)
It’s not the most beautiful cms out there, but it’s very complete
don’t know how useful the split on H-tags is in submenu’s
It’s quite intuitive which is unexpected!

I like it and I give it a 8-
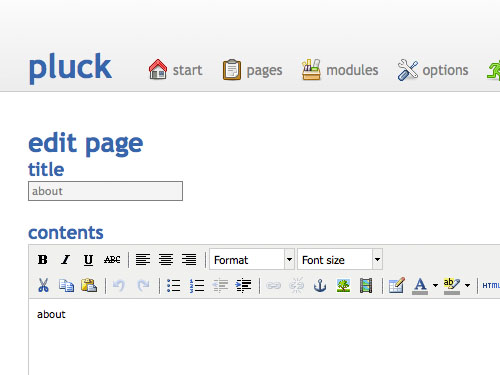

Pluck


Pluck is packed with some nice features, from which we’ve listed the most important ones on this page. To try everything live, take a look at our demo.
Features:

  • create an unlimited amount of pages
  • create your own blog
  • create an album to show images or photos to your visitors
  • include a contact form in your page(s)
  • easy-to-use theming system
  • single user
  • Install 3mb

I like it: 7


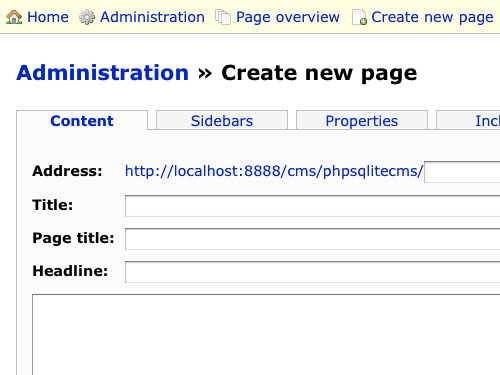
phpsqlitecms

phpSQLiteCMS is good if you want to quickly set up a small website without needing to spend a lot of time studying, installing and configuring (as SQLite is file-based, it just runs “out of the box”). But note that it is no large-scale content management system – it’s a tiny and simple one!

Features:

  • Simple and lightweight
  • Runs out of the box (no database setup required)
  • Optional caching to save server performance
  • Supports news
  • overview and
  • commentable pages
  • photo galleries
  • search function
  • RSS feeds and
  • XML sitemaps
  • need some explaining, very complete, quite technical
  • Install 1.2 mb

It’s an easy instal but you need to use the default inlog data–>user: admin // pass: admin

The default install is also the documentation.
Which means that you need to remove a lot of pages before you can start clean

Good but not for this project: 7-
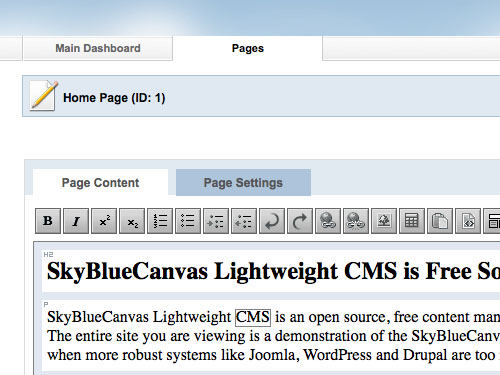

SkyBlueCanvas

SkyBlueCanvas is an easy-to-use Web Content Management System, that makes it simple to keep the content of your site fresh. You simply upload the software to your web server, and you are ready to start adding text and pictures to your website.

Features:

  • Easy-to-use
  • Easy-to-install
  • XML Data Storage (no database required)
  • Extensible
  • Flexible & Powerful Plugin API
  • Skinnable
  • Small in size (3.5MB) <-- hmmmm I got 5MB
  • Valid XHTML 1.0 Strict output
  • Search Engine Friendly URLs (requires mod_rewrite)
  • Customizable Meta Tags (globally or by page)
  • Built-in RSS feed creation of pages, articles and news items
  • easy install (check if server is ready, self config with deletion from install file!)
  • 1 user
  • template editor
  • Install: 5mb

some advertisement in install
strange question about location of website ?? (yes, I want to install it here)
user interface could be better, but that probably because the developer wants to make some money out of it (can’t blame em)

Not my choise: I give it a 6.5
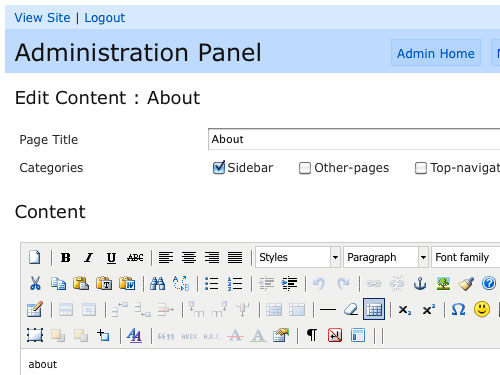

nanoCMS

nanoCMS created by Kalyan Chakravarthy in 2007 is a php open source, gpl licensed flat file content management system (CMS). It does not use a MySQL database and is ideal for small websites. It is a very small CMS package (hence the nano part). Doesn’t take long to setup and is very simple to create pages and edit content. As it is small and doesn’t use a mysql database….. it’s fast, very fast.

Features:

  • one user
  • one template
  • WYSIWYG editor
  • Install: 2,2 mb

Easy install but not configurable at first // username: admin // password: ch4ng3th1s

very nice simple, but kinda heavy for something that’s called nano…
Categories are places on the page: sidebar == content // top-navigation == navigation

It would take me some modification to get it to work how I want it: so not for me but certainly not bad: 6+ (a little more then Nanomus)
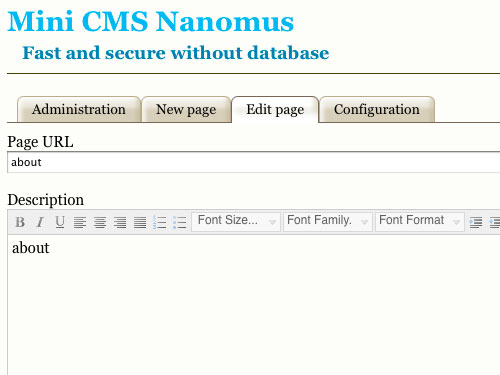

Nanomus

Nanomus is one of the smallest, fastest and more simple free Content management Systems under GPL GNU.

Features:

  • Very small : the complete content management system is less than 100kb, PHP core is less 23 kb
  • Very simple : really simple to install and really easy to manage it.
  • Nanomus store all datas in secure PHP files, no database is required.
  • With Nanomus you can get a real small dynamic website
  • Really fast: with nanomus your website is really light and fast !
  • an unlimited number of pages
  • backup file system
  • deactive page system
  • dynamic menu
  • css template
  • include a filemanager
  • Nanomus is a free content management system, open source, really light, fast and secure.
  • No database required.
  • Nanomus isn’t multi users, only one account is possible.
  • Nanomus backup, if you want, all the olders page version.
  • Install: 153kb

It’s an easy instal but you need to use the default inlog data–>user: admin // pass: admin
Meta is perhaps not so obvious for a unexperienced user
Admin is not ugly, but to call it beautiful is taking it to far.

Nice but to ‘unpleasant’ design: 6
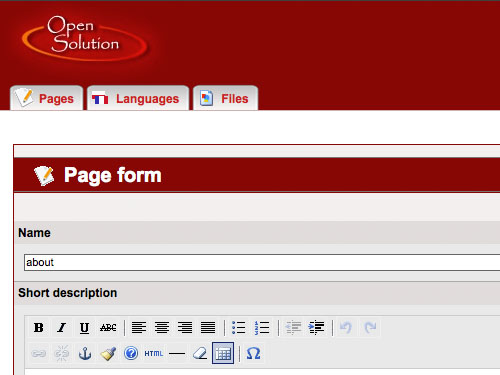

opensolution (Quick.Cms)


Features:

  • Pages and subpages management
  • Images and files management
  • Languages management
  • Configuration
  • Pages and subpages view
  • Pages print option
  • Images view by Lightbox
  • Change language option

Nice cms, but there is a paid model… And I feel that they are holding out on me
If you would need a gallery/contact form, you need the paid-version-extra
Install: 844kb
not for me: 6-
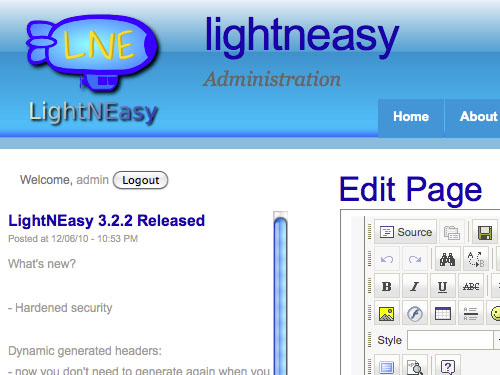

LightNEasy

LightNEasy generates a complete set of HTML/PHP webpages and recreates them whenever you make any changes. Your website will always be updated and easy to edit. No broken links to worry about.

Features:

  • not really nicely designed
  • kinda heavy
  • lots of templates pre-installed
  • admin is too much for my taste
  • template driven
  • website builder
  • and cms
  • language
  • gallery
  • Install: 4,7 mb

not for me: 5


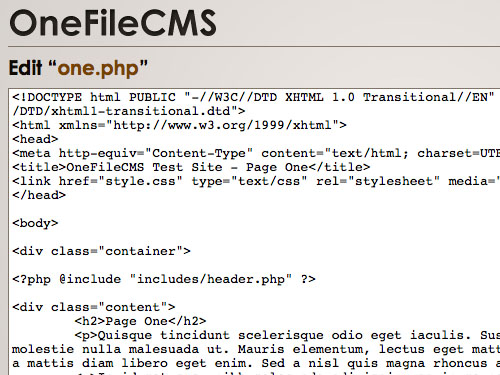
onefilecms


Features:

  • Validating, semantic, and commented markup. Tested in FF, Safari, and IE7/IE8.
  • Small footprint (24 kb)
  • Possibly the easiest installation process ever
  • All the basic features of an FTP application like renaming, deleting, copying, and uploading
  • (Of course, for more complex processes like batch renaming or mass uploads/deletions, you’re going to want to break out an actual FTP program.)
  • Gracefully degrading CSS and Javascript
  • 100% re-brandable with title/footer text stored in variables and a modifiable filename
  • Externally hosted CSS and images for smaller file size
  • (But you can switch it out to your own stylesheet if you need to!)
  • Smart alert if you try to leave without saving your edits
  • very small but extremely technical (you need to know about programming)
  • Install 78 kb (with example site)

It’s not for this project, I think it’s a great starting point for creating your own CMS, but in this case I’ll give it a 4.


Note

Lite CMS I also tested, but didn’t fit one (but probably more) feature that I described above:
autocms(can’t get it to work), editeasy (can’t get it to work), whitecrane (difficult to use, BBCode), le.cms (couldn’t get it to work)
This doesn’t mean they are bad; they just don’t fit my needs.

My advice to all cms builders: create a minimal template series so designers have a starting point for their designs
simple stuff: header, horizontal navigation, vertical navigation, content, sidebar

Categories
AS3 Flash Open source / Freeware Tools of the trade

FlashDevelop 3.0.0 released

My favorite open source project ever, FlashDevelop has released: FlashDevelop 3.0.0 RTM (English, 4MB) .

I started with coding in the Flash IDE, when I realized that there are better programs to code in I started working with SE|PY (ActionScript 2 only). I really loved that program, but it never made it to ActionScript 3 and so I tried FlashDevelop. I have never regretted it, it a beautiful piece of work and I can’t work without it.
So if your pockets aren’t deep, and want to become a better AS2/AS3 programmer. you should try this program.

The only sad thing is that it’s Windows only.

Categories
AS3 Open source / Freeware WordPress Plugin

Updated Syntaxhighlighter

Update #1: hmmmm, stupid but I write these post sometimes weeks ahead…. and this one caught up on me… The new version of SyntaxHighlighter Evolved has ActionScript support.. πŸ™‚
Update #2: I could remove everything below, but I’m keeping this here, perhaps someone can use it…. and it took some time to write, so I really can’t kill my darlings.

A little change I made to the new updated plugin:
find the plugin-folder “syntaxhighlighter” and add the next line to “syntaxhighlighter.php”
[as highlight=”1,3″]
‘as’ => ‘as3’,
‘as3’ => ‘as3’,
‘actionscript’ => ‘as3’,
‘actionscript3’ => ‘as3’,
[/as]
and find in the plugin-folder “syntaxhighlighter”, the folder “scripts” and change the next line to “shBrushAS3.js”
[as wrapper=”true”]
// SyntaxHighlighter.brushes.AS3.aliases = [‘actionscript3’, ‘as3’]; // old line and the bottom of the .js file
SyntaxHighlighter.brushes.AS3.aliases = [‘actionscript3′,’actionscript’, ‘as3’, ‘as’]; // new line
[/as]

the new syntaxhighlighter only uses “as3” and “actionscript3“, and I just changed all my post to “as

Update #3: and update the css, that made the code not wrap….
I removed “white-space: pre;” form “code” and now it wraps:

code  { font-family: "Courier New", Courier, monospace; font-size: 1.2em; /*white-space: pre;*/ color: Gray; }

Today I updated my SyntaxHighlighter JavaScript package by Alex Gorbatchev and it was not easy…

I have a syntax highlighter installed on my blog to show my ActionScript source code in a nice way.
But the first time I installed it, I choose a WordPress plugin which isn’t add to WordPress Plugin Directoryand doesn’t appear to be update.
And if I remember correctly, it didn’t work as it should and I had to add ActionScript. Read my previous decision here.
So I had to upgrade to SyntaxHighlighter Evolved which of course came with some upgrading issues created by my previous install.

First problem: write ActionScript.
ActionScript is not default included in the Syntaxhighter, and you will be advised to use [ javascript ] tag, which is a good advice since AS is almost javascript. It would make your live easier if you choose this option.
But as in my last installment of syntaxhighlighter I want to use Actionscript highlighting.
So there we go:
To do that you need an Actionscript brush. I found two of them: cptloadtest.com has one but it looks like its more for AS2,
and yourpalmark.com which is also the one I choose, because I used his version also with my previous installment and it’s for AS3.

This is what you need to do: install SyntaxHighlighter and if you choose to use [ javascript ]
your done. I was not done yet, so lets continue… Download the shBrushAS3.zip, extract and place the shBrushAS3.js in the correct folder on the server (in my case .../wp-content/plugins/syntaxhighlighter/syntaxhighlighter/scripts). Now you need to change some code in the WordPress plugin:
You can do this in WordPress itself if you have writing permission set, or you can edit the php file on your desktop…
you need to add the highlighted code

// Register brush scripts
wp_register_script( 'syntaxhighlighter-core', plugins_url('syntaxhighlighter/syntaxhighlighter/scripts/shCore.js'), array(), $this->agshver );
wp_register_script( 'syntaxhighlighter-brush-actionscript3', plugins_url('syntaxhighlighter/syntaxhighlighter/scripts/shBrushAS3.js'), array('syntaxhighlighter-core'), $this->agshver);

and

// Create list of brush aliases and map them to their real brushes
$this->brushes = apply_filters( 'syntaxhighlighter_brushes', array(
	'as'       => 'actionscript3',
	'as2'       => 'actionscript3',
	'as3'       => 'actionscript3',
	'actionscript'       => 'actionscript3',
	'bash'       => 'bash',

and now you are ready to go.

I had to change some other stuff ([ source:as ]...[ /source ] into [ as ]...[ /as ] ) and it seems that my css is not playing nice with syntaxhighlighter. hmmmm this is more work then I thought it would be.

I had to deactivate one plugin: autoescape , it didn’t play nice with SyntaxHightlighter. I didn’t use it anymore, and the combination generated gibberish.

Categories
AS3 Open source / Freeware Tools of the trade

TextMate AS3

I’ve been using a code-editor for years now. I started with SEPY and now I’m using FlashDevelop. Both on Windows.
A colleague of mine still uses the Flash IDE (on a mac), so I decide to help him with his transition.

Sadly there is no free editor for the OSX that handles AS2/AS3, but TextMate is not very expensive and very lightweight. So I decide that TextMate would be the programme that would get him out of Flash IDE editor.

With a little help of Google (I haven’t used a mac for about 7 years) I found some help/instructions that are easy to follow. Sadly it didn’t work while I followed the instruction to the letter.

While you start reading the post below, start downloading Flex 3.2 SDK, it’s 118Mb but you’ll need it later on so why not start downloading it now.

Start reading here: textmate actionscript 3 and flex bundles, it’s about the files you will use. But besides being informative, I needed more help.
I found that here: setting up a as3 project in textmate, the same steps will be followed here

  1. Download Textmate (duh), if you want to test this, use the trail version.
  2. Download Flex 3.2 SDK and extract it into your Developer/SDKs folder (but there are more places where you can extract it: just read this, for example /Applications/Flex and /Developer/Applications/Flex is also allowed)
  3. Subversion: follow the instructions from the tutorial: its very easy (read also the note at the bottom of the post)
  4. ActionScript 3 bundle from subversion: I can repeat myself: follow the instructions (to get the Terminal: Apple + space and type Terminal and get it from the list)
  5. This you don’t have to do: in the new Flex 3.2 SDK it’s already included
  6. I didn’t install this either and it worked just fine
  7. It seems that this is not necesarry anymore (perhaps there was an update of the AS3 bundle…). But if you need it: Follow the instructions, but for the TM_FLEX_FILE_SPECS src/Main.as and TM_FLEX_OUTPUT deploy/Main.swf I needed some help because what ever I did, I couldn’t get the described window.
    I found my answer in this:

    That’s a little hidden. With nothing selected in the project drawer, click on the little i at the bottom. You’ll get a box to enter any variables you want for the project.

    source

    And this one was very frustrating: TM_FLEX_PATH Developer/SDKs/Your Flex SDK Folder: this one needed an extra slash TM_FLEX_PATH /Developer/SDKs/Your Flex SDK Folder and in my case it was TM_FLEX_PATH /Developer/SDKs/flex_sdk_3

    Note: Some of this is not necessary when you create a project instead of separate files: File >> New From Templates >> Actionscript 3 >> Project. Just check TM_FLEX_PATH if you installed flex in file that standard is read by Textmate. If not you need to fill it as described above (I needed to do that)

  8. The same as in the tutorial
  9. The same as in the tutorial
If you extract the Flex SDK, you will get a folder named “flex_sdk_3” and the very observant reader will notice that the script used here doesn’t include the path “Developer/SDKs/flex_sdk_3“, so that is the reason you need to add it to the “shell variables” (number 7). You can also rename the folder to “flex_sdk_3.2.0” and then I don’t think you need to add it to the shell variables, but I haven’t tested it!

Some extra information: svn is something that not everybody will use. So if you have no idea what it is, the bundle can also be installed without subversion. But the cool thing about subversion stuff is that it’s always up to date… (And I can’t help you with how you should fix it without svn)

Every blog mentions the price of Textmate: “single user license (€39 ? $53)”. That’s not expensive; unless you live in the Netherlands: “single user license (€48.75)” because we need to pay “Prices above include 25% VAT.” πŸ™

Links in this tutorial:
textmate actionscript 3 and flex bundles
Flex 3.2 SDK
installing as3 and flex bundle for textmate.
flex and actionscript 3 with textmate and fcsh

Categories
AS3 Flash Open source / Freeware Tools of the trade

FlashDevelop 3.0.0 RC2 released

I said it before: I don’t like to regurgitate, but program is so good that I can’t help myself….

As we are now approaching the final release of FlashDevelop 3, this release is the last feature release.

FlashDevelop.org – View topic – FlashDevelop 3.0.0 RC2 released.

FlashDevelop is awesome! If you never used it, give it a try. And don’t be afraid that it’s not a final version: I’ve been using release 3.0.0 from the early beta, and never run into major bugs.

FlashDevelop documentation