Categories
Design Flash

2011 vs 2012

Update #1: I joint a gym to learn how to KickBoxing and Muay Thai! Here is the link to the site: http://www.samuraisports.nl/ (little warning: this website is not a beauty)
Update #2: Brummble the papertoy tribute to ThreeA vinyl: Heavy Bramble is online and ready for downloading: here.

It’s been a while … haven’t posted anything regular in a… year.
That would have been the year 2011: the year I became for the first time a dad.

So here a little update (for the one person who still reads this blog).

2011 and a little bit before that

I had big plans; I wanted to show everybody that my live didn’t change when I got a kid…
Boy…was I mistaken.
Don’t get me wrong: this has been the best year of my live!!
But the things I wanted to do this year, the plans I made… nothing of that happened.
My daughter happened! and everything else followed HER plans.

I wanted to be a part of her live and not only look after her in the weekends.
My girlfriend and I both decided to have a 4 days work week so my daughter only has to goes to the daycare center for 3 days.
The employer I was working for at that time didn’t want me to work 4 days. I tried to use a dutch-law: they said they would take me to court, etc, etc.
I don’t want to make this post about my former employer (if you want to know more about this story, just ask), so I decide that it would be best for the both of us to find another job (1.5 month before my daughter was born…. I know: I’m still bitter about that).
But here is the good news (remember: the best year of my live) I found a great new job at noprotocol.nl!!!
I could work there for 4 days, they are very flexible and an awesome group of talented people.
AND I didn’t miss anything daughter-related stuff, which I can recommend every dad to do: have a day alone with you kid.

So the first 6 month of the year 2011 is mostly about being a dad (boring stuff for people who don’t have kids, nothing to explain to the people who have them).

Professionally (during the day I’m a Flash Designer/Developer) I learned about Robotlegs, AS3-navigator, LoaderMax, etc. Had some interesting talks with the people of “the bigger boat” (group of freelancers). AND I can do the job in 4 days (sometimes with some creative time-management from my employer and myself) which I knew would be possible, but conformation is alway nice.
In the next 6 months of 2011 I started to think about what I wanted. What makes me happy, what is making me happy right now and what will make me happy in the future. I miss the feeling I had when I started to work as a junior designer: wanting to learn EVERYTHING to become a senior. But now I am a senior… what’s next? Do I want to be a programmer for the rest of my live? Questions that are not answered yet.

I’m also a papertoy designer (something I do at night). This year was not a good year for papertoys: I needed my sleep!
I have done 1 exhibition in Amsterdam and I did an exhibit at Sneakerness Amsterdam (also the first time that I sold papertoys).
Both exhibition was done the rest of the dutch papertoy designers (3eyedbear, Marshall Alexander, Dolly Oblong) and one german papertoy designer (Nick Knite).
For these events I made 2 new papertoys, but they will not be downloadable. Nick Knite and myself wanted to organize a papertoy calendar with papertoy designers we both like… sadly I had to cancel that: no time to start/finish it 🙁
All and all not very productive year.

2012

My live (and this blog) is more than just one specialty. So here a short list:

Flash / Development

This is my job, this is how I make a living… and Flash is Dead! (again). I’m not worried so I will keep learning even more about that subject. But I need more! I have made a small CMS in 4 weeks in PHP (what an ugly language is that!) but that didn’t excited me much.
So I want to learn haXe! I’m quite excited about this language so I will be writing about that soon.
I would love to lead a team… or join a group of flash/geek-superstars (whatever moves me forward)
I want to finish what I have started in 2011:

  • finalize (and improve) my project setup.
  • automate the stuff that I have to do over-and-over-again

Find out how a senior finds his “what’s next”
Start having coffee-meeting with the industry tech-directors/tech-team leaders/etc to answer BIG question
Will be joining the after-work-drink-on-friday with my colleagues more often (once a month)

Urban Papercraft / papertoy

I really have no plans for papertoys: I used to do this to relax, but last year I relaxed by sleeping.
There is still two books I wanted to write…. but I can’t promise that it will be finished this year.
You can always ask me for a workshop or lecture about papertoys: just let me know!

The graffiti inspired papertoys I do will not be downloadable: that will be my art and art can’t be given away 😀
So what can the fans download? I have created a toy based upon 3A vinyl toy: Brummble. That will be released very soon.
And more perhaps? Not really a plan for that but sometimes I get a tickle and that needs to be scratched… and the product of that scratching (now this metaphor is getting dirty) will be downloadable.
Can you ask me for exhibitions? Yes, please do. I like the idea that my work is art and not only a (paper)-toy.
That is also the reason that I have titled this paragraph “Urban”: urban-art, urban-toy, urban-paper that’s what I will be making.
Can you ask me for a papertoy book? Yes, please do. I have worked on two books with much pleasure and would be honored to asked for another.
Can you ask me for a custom? Yes you can… but time is very precious right now. So your project must be VERY interesting.
I have promised to finish a custom Zealot Guard from Abz, and that is what I will do. Why do this custom? This is a VERY exciting project by a (perhaps the only) female papertoy designer.
There are some plans to visit Germany for some workshops, but other than that I have no idea.
2012 will reveal itself to me as it goes towards 2013 😀

Blog

Now I have some energy back in the evening I will be writing again on this blog, but not as often as I did before 2011. I used to write every week. That will change to once a month: a ‘big’ post. The ‘big’ post will be a tutorial or something else that needs more explaining. That will mean that there will be at least 12 more posts. Between these ‘big’ posts there will be some papertoy related images (minimal writing).
I will be writing about haXe, so that will be exciting (for programmers). I think I can be of some help making haXe more accessible for the ‘normal’ programmer.

That is not the only way to follow me: I have a twitter account. here I talk about everything that interests me (design/development/sneakers/games/video/whatever)

Misc

When my daughter was born I quit the gym (it was too expensive). I wanted to find something cheaper… It turned out to be very cheap: I didn’t join a gym but I also didn’t do something else. This year I will be joining a gym…. and to be very specific: I want to try Kickboxing!
Another thing that I will do, or stop doing… Is doing things for free. And that goes also for friends and family; they will pay (not necessarily with money, but for free doesn’t work for me anymore)

I’m looking forward to 2012!
Categories
Design Urban papercraft

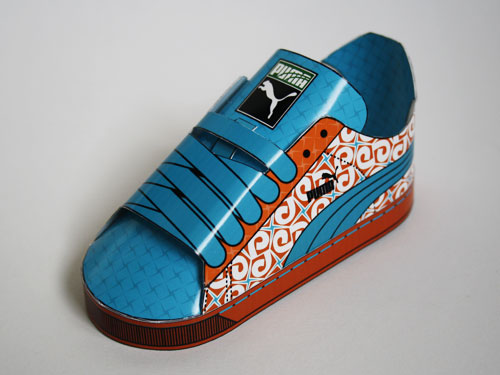
PUMA – States/Suede/Clyde – urban paper sneaker – part2

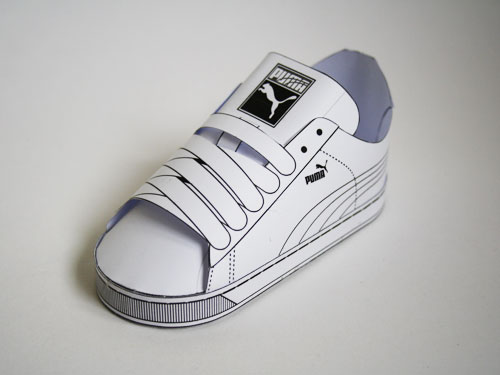
Today I present: PUMA – States/Suede/Clyde – Urban paper sneaker

Want to read more about the process visit this blog post or this one.

Because a picture says more than a thousand words:

Paperkraft fans will recognise the logo: this is a paper sneaker made for Ron Rementilla from Paperkraft.blogspot.com.
He has written about my PUMA First round papertoy and suggested that people who wanted a template should leave a comment…. And Ron mentioned that he wanted one too…. I’m sure that he didn’t mean this, but I needed to create a skin for this model and thought it would be a nice gesture to thank Ron.

You can download the file for the PUMA – Paperkraft – Urban paper sneaker here:

The .ZIP file contains a .PDF
(You can use freeware like FilZip or 7zip to extract a .ZIP-file and read a .PDF with Acrobat or Foxit)


But I know a lot of people want to customize this PUMA sneaker, so if you are interested in creating a custom paper sneaker you can download the Blank PUMA – States/Suede/Clyde – Urban paper sneaker here:

The .ZIP file contains a .PDF
(You can use freeware like FilZip or 7zip to extract a .ZIP-file and read a .PDF with Acrobat or Foxit)

If you like this, leave a comment. If you build one, show me a picture. If you customize one, … you get the picture ….

Categories
AS3 Design Flash Urban papercraft

Twitter rss reader in Flash as3

Update #1: must read this post, otherwise this code will fail when you place it on your server!

I recently started my own company (eMCeeKay.nl) and I need to make a website for it…. Not really a problem besides that I don’t have any time to create a design.

So I was thinking about a easy way to update this website without spending extra time on that.

Because the main focus of the company is papertoys (urban papertoys), I need design or papertoy related info in my my new website ().

And I came with two ways to update it without extra effort: twitter (I tweet about a lot of stuff but primarily about papertoys) and this the content on this blog (category: urban-papercraft).

I started with the Twitter part.
There are two Twitter AS3 libraries that “speak” to the Twitter API: twitterscript/ and tweetr/.
But after reading the source I concluded that it was a little bit to much: I don’t want to tweet from emceekay.nl or do searches, so that was not the way to go.

A little google search gave me the solution: http://www.theflashlogs.org/flash/displaying-twitter-feeds-in-flash-with-rss/, simple using the standard rss from Twitter (in my case: Matthijs Kamstra – Twitter – rss).

The code on theflashlogs.org is pritty simple, and very easy to use.
So my code is a little addition to that, I need some stuff done to the rss feed:

  • remove “MatthijsKamstra:” form the title
  • convert @paperkraft to a link
  • convert #Mecha6 to a link
  • convert http:// to a link

Here is my code:
[as light=”false” wraplines=”false”]
package nl.emceekay.twttr
{
import flash.display.MovieClip;
import flash.events.Event;
import flash.net.URLLoader;
import flash.net.URLRequest;
import flash.text.TextField;
/**
* // nl.emceekay.twttr.TwttrExample
* …
* @author Matthijs Kamstra aka [mck]
*/
public class TwttrExample extends MovieClip
{
//default: http://twitter.com/matthijskamstra
private var url:String = "http://twitter.com/statuses/user_timeline/27657030.rss";

private var _txt:TextField;

public function TwttrExample()
{
stage.scaleMode = "noScale";
stage.align = "TL";

// generate textfield
_txt = new TextField()
_txt.x = 10;
_txt.y = 10;
_txt.width = stage.stageWidth – 20;
_txt.height = stage.stageHeight – 20;
_txt.wordWrap = true;
_txt.multiline = true;
_txt.autoSize = "left";
addChild(_txt);

// start
getFeed(url);
}

//////////////////////////////////////// loading rss / show rss ////////////////////////////////////////

private function getFeed (inURL:String) : void
{
_txt.htmlText = "getting tweets";

var loader:URLLoader = new URLLoader();
loader.addEventListener(Event.COMPLETE, onFeedHandler);
loader.load(new URLRequest(inURL));
}

private function onFeedHandler (e:Event):void
{
_txt.htmlText = "";
var _feed:XML = new XML(e.target.data);
var _item:XMLList = _feed.channel.item;
for each (var feedItem:XML in _item){
var _title :String = feedItem.title;
var _pubDate :String = feedItem.pubDate;
var _link :String = feedItem.link;

_title = convertTweet(_title);

_txt.htmlText += _title + "<br><i>" + _pubDate + "</i><br><br>";
}
}

//////////////////////////////////////// twitter specific ////////////////////////////////////////

// one place to convert the tweet
private function convertTweet (inString:String):String
{
var _str:String = inString;
_str = twttrStripName(_str);
_str = twttrConvertHTTP(_str);
_str = twttrConvertMention(_str);
_str = twttrConvertHashtag(_str);
_str = twttrConvertSmileys(_str);
return _str;
}

// remove the writers name from the tweet
private function twttrStripName (inString:String):String
{
var _str:String = inString;
var _charNumber:Number = _str.indexOf(":");
return _str.substr(_charNumber + 2);
}

// convert http-strings to links
private function twttrConvertHTTP(inString:String):String
{
var _str:String = inString;
var _array:Array = _str.split(" ");
for (var i:int = 0; i < _array.length; i++)
{
var _str2:String = twttrStripChar(_array[i]);
if (_array[i].indexOf("http") != -1)
{
_array[i] = "<u><a href=’" + _str2 + "’ target=’_blank’>" +_array[i] + "</a></u>";
}
}
return _array.join(" ");
}

// convert mentions (@) to links
private function twttrConvertMention(inString:String):String
{
var _str:String = inString;
var _array:Array = _str.split(" ");
for (var i:int = 0; i < _array.length; i++)
{
var _str2:String = twttrStripChar(_array[i]);
if (_array[i].substr(0, 1) == "@")
{
_array[i] = "<u><a href=’http://www.twitter.com/" + _str2.split("@")[1] + "’ target=’_blank’>" +_array[i] + "</a></u>";
}
}
return _array.join(" ");
}

// convert hashtags (#) to links
private function twttrConvertHashtag(inString:String):String
{
var _str:String = inString;
var _array:Array = _str.split(" ");
for (var i:int = 0; i < _array.length; i++)
{
var _str2:String = twttrStripChar(_array[i]);
if (_array[i].substr(0, 1) == "#")
{
_array[i] = "<u><a href=’http://twitter.com/search?q=%23" + _str2.split("#")[1] + "’ target=’_blank’>" +_array[i] + "</a></u>";
}
}
return _array.join(" ");
}

// TODO: [mck] convert 🙂 to a smiley image
private function twttrConvertSmileys(inString:String):String
{
var _str:String = inString;
return _str;
}

// remove "strange" characters from the end of the string
private function twttrStripChar(inString:String):String
{
var _str:String = inString;
var _charArray:Array = [‘,’, ‘;’, ‘:’, ‘ ‘, ‘-‘, ‘_’];
for (var i:int = 0; i < _charArray.length; i++)
{
if (_str.charAt(_str.length – 1) == _charArray[i]) {
_str = _str.substr(0, _str.length – 1);
}
}
return _str;
}

} // end class

} // end package
[/as]

Currently I have only this proof of concept, but soon I will post the example on emceekay.nl

Because this is part one of what I want to do, and don’t want to search for every link again, I’m posting also the WordPress link here (it’s just because I’m lazy).

So here the feeds I will be using:

Categories
Design Urban papercraft

II LOVE mag – YEBOMAYCU

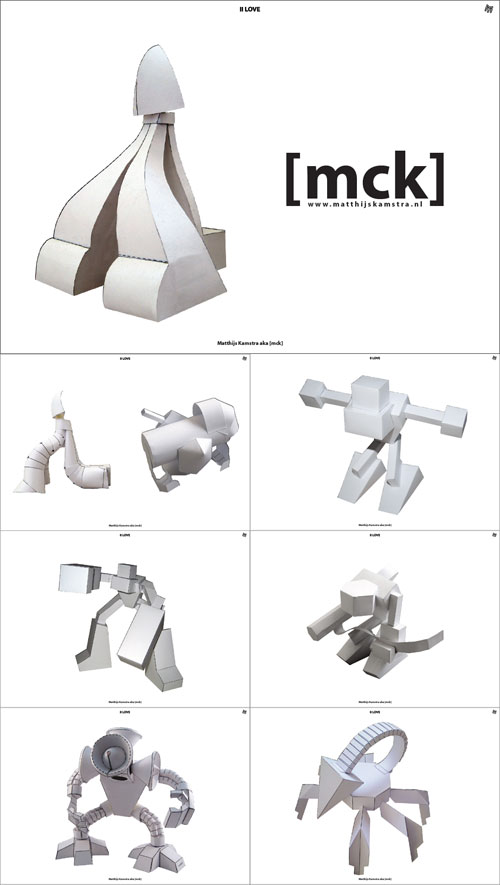
I’m in the latest edition of the II LOVE magazine from Marko Zubak

In this issue we will remain on the first phase of creation, the form. Here the accent is put on the sculptural aspect of denuded paper toys, giving an impression that each one of them represents it’s own species.
Here is shown a selection of more than 50 paper toys, but of course, there are lot of other different kinds of paper toys out there. Many great designs are left out because of various reasons and I feel really sorry for some of them.

by Marko Zubak, creator of II LOVE magazine

Download II LOVE magazine from YEBOMAYCU.

Categories
Design Urban papercraft

Papertoy design – The basics

One of my most popular post is about how to create papertoys (How to create your own papercraft).
It seems that a lot of people are interested in papertoys and how to make themselves.
But there is not a lot of information about it, so I started this series.
Do you want to know more about my reasons read this.

Because I have not a plan about writing about this, I will call this Lesson 1 – The Cube

The basics…

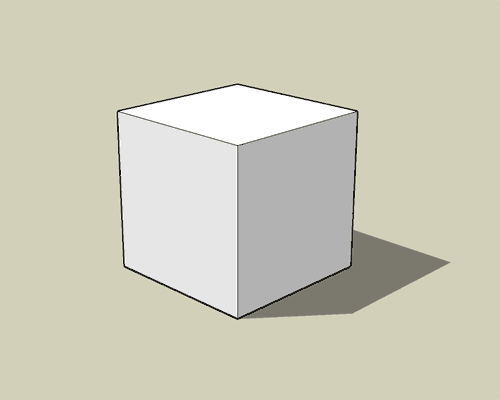
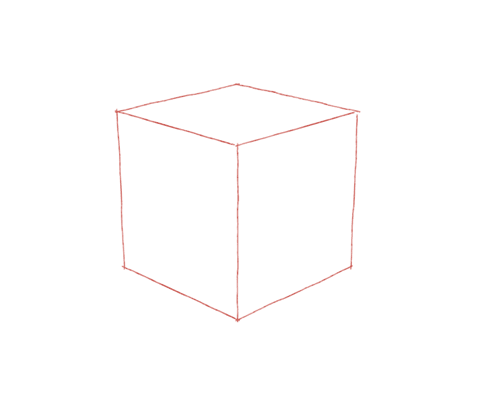
The first shape you will run into when you start with papertoys is the cube. It’s easy to recognize: all sides (width, height, depth) are the same.

cube 3d
When you build one, it will look something like the one you see above. Not really impressive, yet.

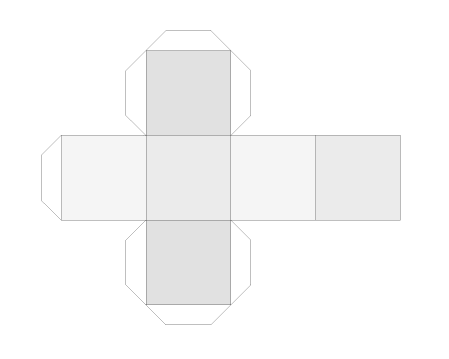
Flat version of a cube

Okay, you probably know how a cube looks, but how does it look flat on a piece of paper:
cube flat

How do I make it into a Urban Papertoy?

For the cube I see 2 methods:
1. Design a pattern/print for it.
2. Add stuff to the cube.

Method 1: Find a cube-pattern

The thing that I do first is, print it out and build the model. It’s strange but when you can hold it, flip it, etc, you will get more ideas then when you just look for it in your head. It will get your creative juices going. Look for clues in the real world…

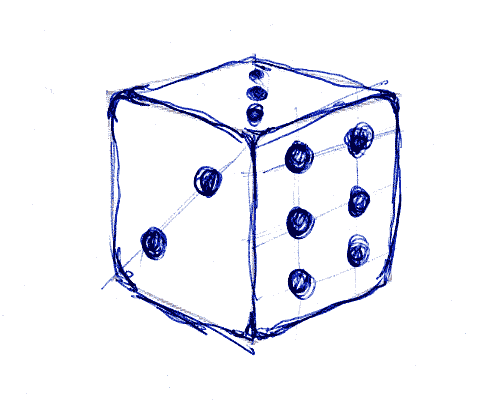
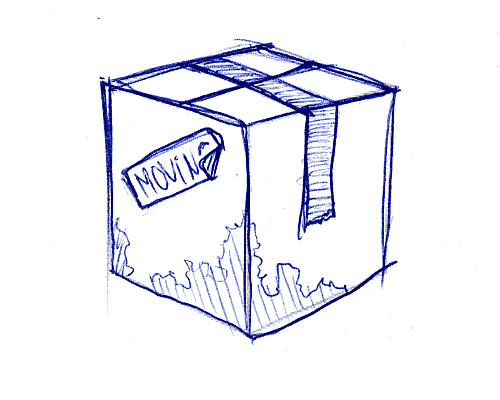
What is a cube in the real world? A dice
Tutorial-cube image-dice
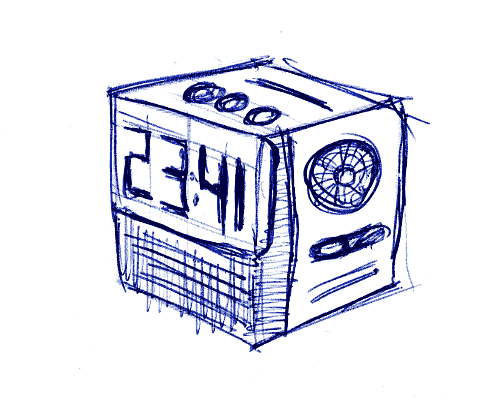
alarm-clock
Tutorial-cube image-alarm
table
Tutorial-cube image-table
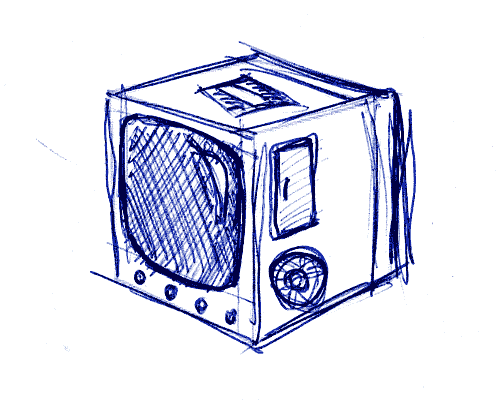
tv
Tutorial-cube image-tv
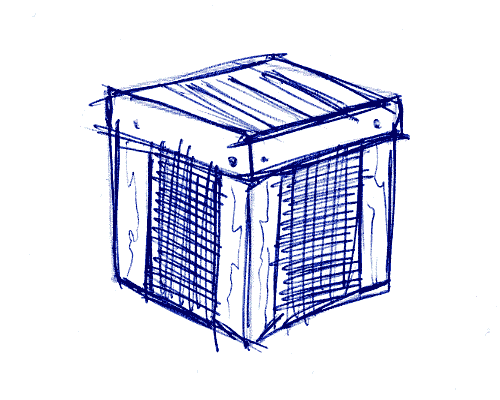
box
Tutorial-cube image-box
, …. hmmmm not a lot a stuff is really a cube….
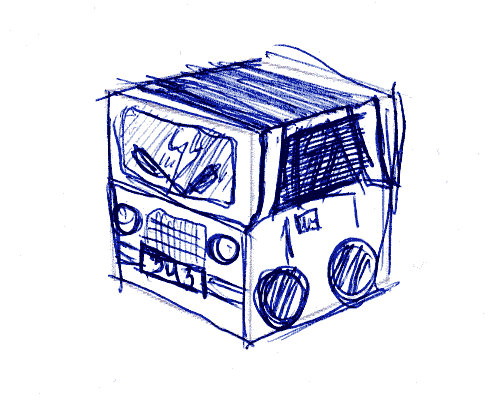
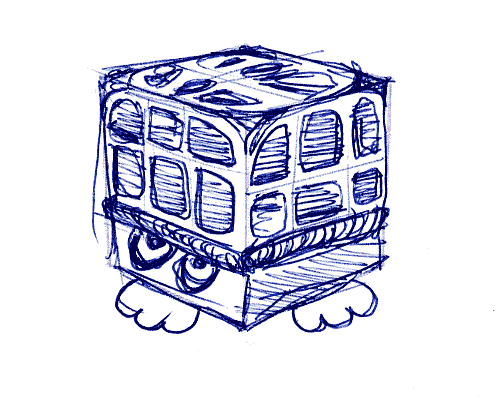
Perhaps a little car or bus when you square them out…
Tutorial-cube image-car
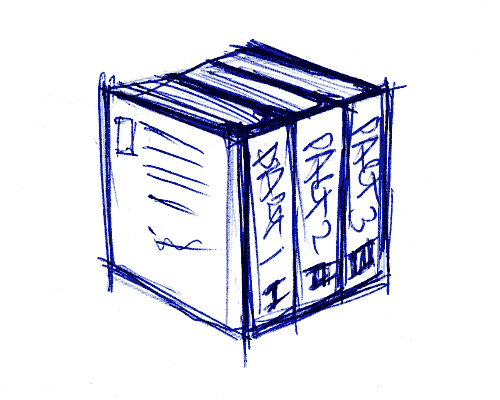
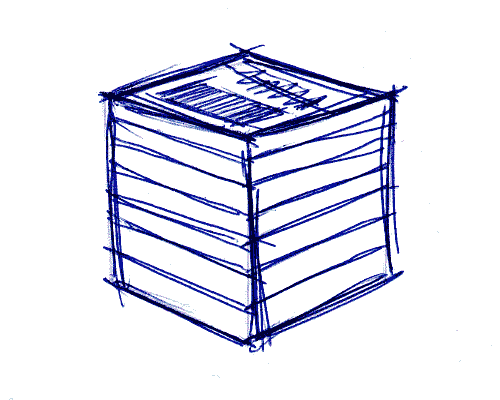
A couple of rectangle shaped object can make a cube: stack of books, cds, video, …. you get the idea.
Tutorial-cube image-books
Tutorial-cube image-cds

But that would only create “dead” object (there are not a lot of living objects that are square), so we need to expend our horizon to other objects.

Method 2: Adding stuff to the cube

Now we start adding stuff. This method gives you more room to create cool stuff.
Lets try a couple:
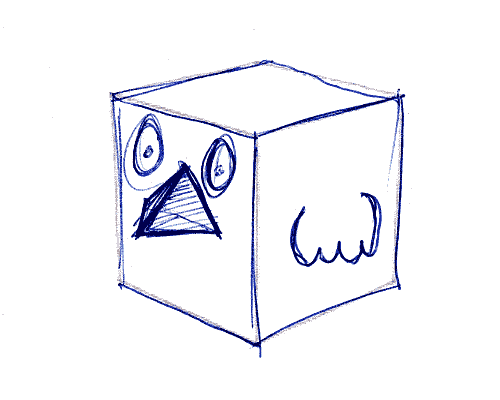
Add a beak, make the cube yellow and you have a little bird.
Tutorial-cube image-littlebird
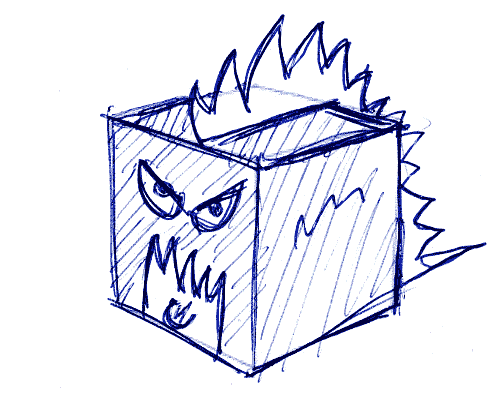
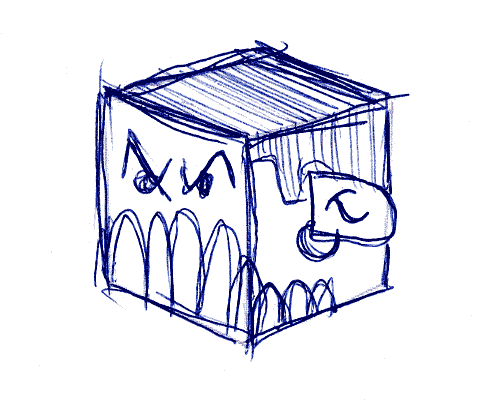
Add a back fin, make the cube green and you have a prehistoric beast.
Tutorial-cube image-monster
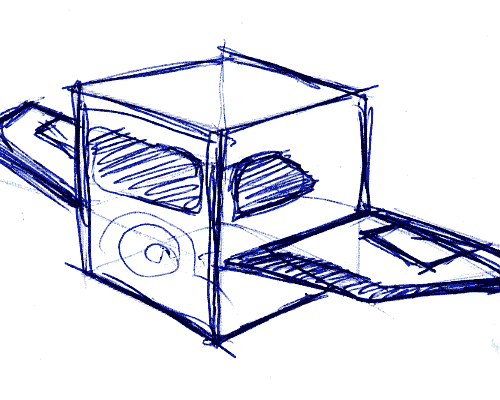
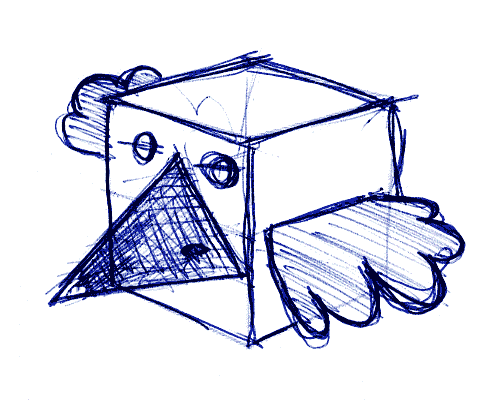
Add two wings and you have a plane…. or another bird.
Tutorial-cube image-plane
Tutorial-cube image-bird
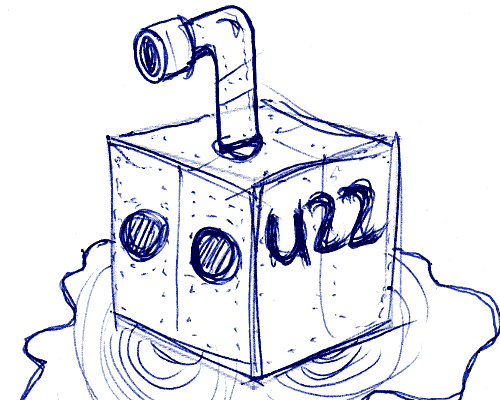
Add an periscope, some water and you have a submarine.
Tutorial-cube image-sub
Add ears and get a head.
Tutorial-cube image-head
Sometimes it helps to rotate the object a little bit. In this case with our cube it will not help you a lot but lets try that.
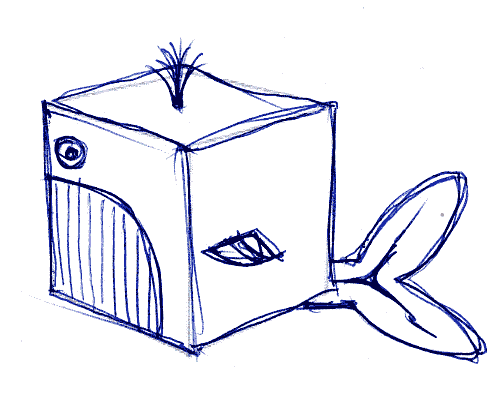
Add an tail and get a whale.
Tutorial-cube image-whale
Add four feet and get a turtle.
Tutorial-cube image-turtle
You can even add an extra cube, and make a totem pole.

Method 1: How to create/draw a cube-pattern

cube sketch
You can sketch everything with a cube 3d print out like I did. Then you have a global idea how you pattern should look. Then you’ll take your favorite design program (in my case Illustrator) and open the flat template and start designing.
The only problem that you will need to know which part goes where AND and how the pattern connects to the other parts of the template.
You can also build the cube, get your drawing tools out (markers, paint, pen, pencils, whatever) and color/draw the pattern that you want. When you are finished, get a scissor and cut the cube open. Scan it and redraw it, or just draw some glue tabs on it and you are done.

How to create/draw the additional stuff

The same as above: you can sketch everything. Or you start with building a cube and adding stuff as you go. This is a method I use a lot: it’s faster then thinking every thing out on a computer and you see at once if the measurements are correct. If you are satisfied with would you just added to the cube you can measure it with a ruler and rebuild it in your favorite design program. Or cut it of, scan it and then redraw it.

Download links

To get you started I have template with a blank cube for you to download. So you can try some of the technique described here in this tutorial. The zip also contains some of the stuff you can add to a cube to make it more fun.

Happy cut’n & fold’n

[download of a cube/with extra’s like hands]

Your input is needed

I’m trying to write a book about papertoys and how you can design it. It’s not for me, I already know what I’m doing, it’s for you.
So if you have some questions, use the comments to say it to me.

No questions for me? Just let me know what you think a cube also can be?
Or perhaps examples that you have seen based on a cube.

Use the comments!

Categories
Design Tutorials Urban papercraft

Pre-post about Urban Paper Toy tutorials

One of my most popular post is about how to create papertoys (How to create your own papercraft).
It seems that a lot of people are interested in papertoys and how to make themselves.
On Nice paper toys (NPT) this question pops up now and again on the forum.
You can buy a book about it, if you want to know more about it: Urban paper toys (well you should buy this book anyhow because I’m in it 🙂 ).

But besides my post about this subject you’re on your own…..
Well perhaps not for long! I’ve been playing with this idea for a while now of making a tutorial series about papertoy and how you can make one yourself. That got me thinking….
It seems that people really enjoy making/creating papertoys, so why not make a book about it?

…… hmmm a book, I have never thought about writing a book (grammar is not really my thing, not in English and not in my native tongue), I never wrote a book or designed one (well… not recently).
So I have no idea where this series is taking me, but here it is:

I want to make a “book” about creating/designing Urban Paper toys. But I’m a internet designer/developer, I have no experience with book design, no experience with writing a book and no idea how to do it.
It doesn’t matter, I have my blog. I can write and rewrite as much as I want.
And I have something that a conventional writer doesn’t have: User generated feedback….. (no idea what that means? It’s you giving me comments/advice/whatever and helping me write this “book” by giving comments).

I say “book” because you don’t really need the book, because you can read it on my blog. But for the less internet savy peeps I can create a download link for a e-book or a you can buy a book.
I have searched for options to Self Publish and I found a couple, but these two sites seem to popup the most: lulu.com/ and booksurge.com/.
But before I can think about that, I need to write about papertoys and how they are made.

So this week I’m focusing on how I will do this on my blog.
But in the mean time, use the comments to show me what you want to know

And perhaps we will write a book 🙂

Categories
Design Urban papercraft

Shameless selfpromotion

Shameless plug of the book I’m in: Urban Paper

Categories
Custom Design Grumm Urban papercraft

Little Grummerboy – a Grumm custom by Hardy

I feel ashamed, and I should! This custom is laying around on my virtual desktop for a long time now.
And it’s really great!

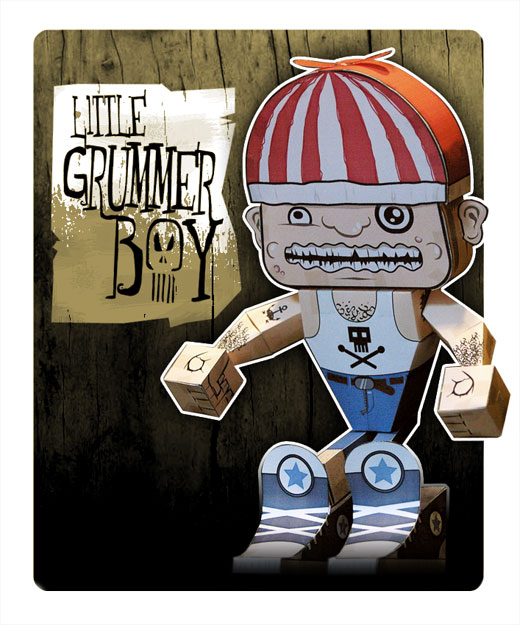
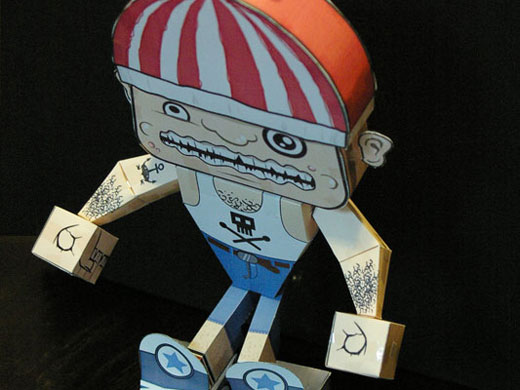
I present: Little GrummerBoy a Grumm custom by Hardy
Little Grummerboy by Hardy, a Grumm Custom

The .ZIP file contains a .PDF
(You can use freeware like FilZip or 7zip to extract a .ZIP-file and read a .PDF with Acrobat or Foxit)

Little Grummerboy by Hardy, a Grumm Custom

So lets start introducing: Hardy a German graphic designer and allround creative.
You can visit Hardy on his own blog: thepaperjam.de, it’s in German so not readable for everyone 🙁 .
More into English? Perhaps you should visit him on myspace: Hardy has the most awesome myspace I have ever seen which is dedicated to his papertoy Bottecc.

Bottecc
You can download the Bottecc templates at the bottom of page, just search for “bottecc beta template”. (it’s a illustrator EPS, he should to change that to PDF… oh well!)

But that’s not all, Bottecc is a papertoy wrestler… Yes you heard it correct.. This papertoy can busta move:

As Hardy put it:

i started working on bottecc with the idea to make a papercraft that can really move and wrestle like the good old wwf-stars.

The subtitle of Hardy’s site is “Paper wrestling association“!
Too bad that the idea is not finished yet. I would love to send a Grumm into the ring 🙂
I don’t think there many papertoys out there that can beat Grumm 😀

Categories
Custom Design Drukk Urban papercraft

Urban papercraft: Marshall Alexander

There are really some great dutch papertoy designers, and Marshall Alexander is one of them!

Limi-Ted

Marshall Alexander is, like me, one of the designers that are invited to contribute to the book made by Matt Hawkins (read more) and proud and active member of Nice Paper Toys!

Marshall is one of the most modest people that I know, but I don’t have to be….
He thought that he needed some practice, so before he launched his own papertoy series (Foldskool heroes) he created a series of custom:
A Hedkase by NiceBunny:
Om mani
A SIZZA by Nick Knite:
Supa-catcha-Sizza1
A Speakerdog by Ben the Illustrator
Bark to the Future Speakerdog

And some of his own papermodels:
toxicmyk
Retrobot

And after that I found his thing: the one piece papertoy…
I like this one very much:projectfatchunk
projectfatchunk
and it’s on a postcard!!!

And then he decided that he had practiced enough: and started with the amazing Foldskool heroes series:
Foldskool series 1
I must confess that I didn’t took the time to download the Foldskool template when Marshall published it…. But when I did, I wanted to create one: the template is really very smartly constructed.

Foldskool series 2

A little quote from Marshall’s site:

… aiming to make money doing what I liked to do best: graphic design and illustration. So currently I work as a graphic designer at a small company in The Netherlands and spend my spare time illustrating my childhood memories and designing papertoys. Enjoy!

I’m glad that I’m created a beautiful Foldskool heroes Batmobile, because his reaction was Nukk:
Marshall did a Drukk-custom, which I really love:
Nukk a Marshall Alexander custom
Nukk is really the bomb.

slideshow


Categories
Custom Design Urban papercraft

Custom papertoy: Flowerr Kidd

Another custom (this is the first time I do this and probably the last) for Wilson the Robot from Eric Wiryanata.

This is a reaction to the custom Eric did (Zombie Grumm).
I explained in my previous post (Custom papertoy: Wilsumm/) why there are two customs:

  1. usually I create a skin in Illustrator
  2. print/build the model
  3. see what needs improvements
  4. fix it in the Illustrator
  5. print/build the model again

This time I used the same method, but after I saw what improvements I needed to make (3), I also concluded that I’m creating the same “bad-ass” skin over-and-over again.
So I created a new skin (yes, a sweet pink one) and made the improvements in that model and rebuild that model.

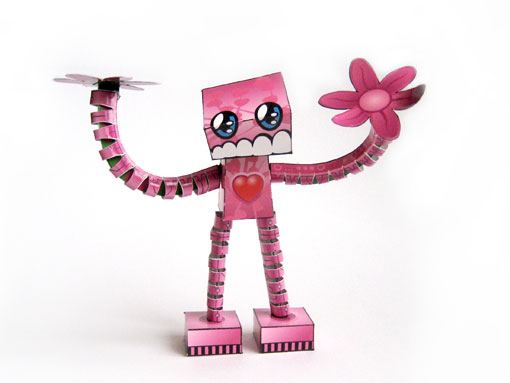
Today I present: Flowerr Kidd

Flowerr Kidd: a custom by Matthijs Kamstra

The .ZIP file contains a .PDF
(You can use freeware like FilZip or 7zip to extract a .ZIP-file and read a .PDF with Acrobat or Foxit)

This model is not complex to build, but if you need some help building the basic Wilson visit the instruction page (at the bottom of the page), but my customization you just need to analyze my photos.

Wilson is a “doodle” (Eric used this to describe his model) papercraft and some parts don’t work like I want them to (the feet for example).
My version doesn’t need duct tape to keep him standing: just put some weight in the feet before you glue it shut! (I used dry rice, but nuts/bolds, dry sand, putty, coins, etc will work just fine)